Tuesday, 11 September 2012

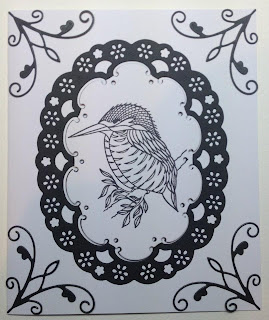
Katy Sue Blog Hop Winner

Well I hope you have been enjoying the shows on Create & Craft with the lovely Noreen McKie showing off the fantastic new double CD ROM - The Christmas Spirit.


We attempted our very first Katy Sue Designs Limited UK Blog Hop to coincide with the launch. We had a few technical hitches, which we managed to sort out and delayed the announcement of the winner.

The winner of our very first Blog Hop, winning a copy of the Christmas Spirit CD ROM is.......................................

The Tidy Crafter from Boston in Lincolnshire
 
Congratulations!

Tuesday, 4 September 2012

Katy Sue Designs 1st UK Blog Hop


I am pleased to announce to the very first UK Blog Hop from Katy Sue Designs Limited to coincide with the launch of the the brand new Double CD Rom called Wine Buffs - Spirit of Christmas. This fabulous Double CD Rom will launch on Create & Craft (Sky 671) on Friday 7th September 2012 with the lovely Noreen Mckie.

Here are some pics of a very quick sample I made


If you would like to be in with a chance of winning this brand new Double CD Rom, then you need to follow the "Hop". You need to leave a comment on my blog, and then a comment on each of the other 3 blogs, launching as follows:

Wednesday - Sue - Inspire Me - Click HERE
Thursday - Vee - Paper, Glue, Create - Click HERE 
Friday - Katy Sue Designs Limited - Click HERE

If you have come here via one of the above blogs, please make sure that you have visited and left a comment on them all under the relevant Katy Sue Designs Limited Blog Hop Post

The competition will finished at midnight on Saturday 8th September. Records will be checked on Sunday 9th September and the winner announced on Monday 10th September

Don't forget to tune into Create & Craft TV on Sky 671 from midday on Friday and check the schedule throughout the week to see some lovely samples and great demonstrations from Noreen.

Thanks for reading and happy crafting!

Paul x

Wednesday, 6 June 2012

Katy Sue Designs - Multi Function Die Cuts

How to make a free standing card from the Multi Function Die Cut Card Blank

I recently made some cards in a workshop using the Multi Function Die Cuts from Katy Sue Designs and thought I would do some instructions on how them into a free standing card. The following measurements are the same for each of the 4 different designs. For this tutorial, I have used Elegant Flowers (Ivory)

Working on the back of the card blank and measuring from the bottom, mark the card at the following points on both the left-hand side and then on the right-hand side:
·         7cm
·         8.5cm
·         10cm
·         16cm
·         17cm

Then using a ball/scoring tool, score from left to right at the following points:
·         7cm
·         8.5cm
·         10cm

Now fold creating a concertina as indicated in the picture below:


Now go to the mark you made at 16cm and measure in 3cm from the left and make a mark, and then make a mark at 9cm, you then need to cut a line with a ruler and craft knife between 3cm and 9cm (as indicated by the straight line in the picture). Now go to the point where you made a mark at 17cm and measure in 3cm from the left and make a mark and then make a mark at 9cm, you then need to score a line between 3cm & 9cm (as indicated by the dotted line in the picture) Now cut a straight line from the 3cm mark on the 17cm line down to the 16cm line and repeat the same at the 9cm mark – you have now created a flap as indicated in the picture below

The short part of the card blank will now sit under the flap you have created. The images below shows the front and back of the card blank
You are now ready to decorate your card!
The flap at the back can be hidden with different things – have a look at some of the finished samples

Products used in the above samples are as follows:

·         Multi Function Die Cuts - Hearts

·         Mabel Lucie Atwell Vo.2 CD

·         Multi Function Die Cuts - Elegant Flowers

·         Die Cut Dimensions – Wild Flowers Set 2

·         Multi Function Die Cuts – Spring Flowers

·         Wishing on A Star CD

·         Wishing on A Star Die cut Stickers

For the Mabel Lucie Atwell sample, I put the Multi Function Die Cut through my inkjet printer. I have a rear feed printer and I used low tack tape on the reverse of the die cut area. Please be aware that there small parts on the die cut area which may get caught in your printer so you need to make sure that they have been removed. Please note that if you wish to print onto the Die Cut Dimensions, you do so at your own risk and that Katy Sue Designs and I take no responsibility for any damage that may be caused to your printer if you do.

All of the above products are available direct from Katy Sue Designs HERE

Sunday, 27 May 2012

Oyster STamps Bog Hop Winner

Oops! I am a bit behind announcing who won the Blog Hop. The winner is........... Flowergirl.

Once again, thank you all for taking the time to join in with the Blog Hop and leaving comments and hope you can join me on the next one!

Friday, 25 May 2012

Oyster Stamps........ last chance

Thank you to everyone who has joined in with the very first Oyster Stamps Blog Hop, I hope you have enjoyed looking at what the other members have done. In order to be in with a chance of winning 2 sets of the Spellbinders Cut and Fold Dies, don't forget to leave a comment on each of the design team members blogs. The closing time for making a comment is 6pm Friday 25th May (today) and the winner will be announced on Saturday 26th May.

Thank you for taking the time to visit my blog and leaving a comment

Paul x

Monday, 21 May 2012

Oyster Stamps Blog Hop - My turn!

Well here goes, my first ever Blog Hop for Oyster Stamps.

I am 4th on the list, so if you have come to me first, you need to go back and see the others:
Day 1 was Neet
Day 2 was Linda
Day 3 was Pam
Day 4 is me
Day 5 is Barbara
Day 6 is Martine

I have done this as a scheduled post, so I hope it works!
If you would like to take part in the giveaway and be in with a chance of winning 2 Spellbinders Cut & Fold dies, then  you need to comment on all 6 of the entries.

So here goes...................................


Ingredients:
  • Spellbinders Floral Burst Cut & Fold
  • Spellbinders Damask Accents Border
  • Spellbinders Standard Circle Large
  • Memory Box Valerian Flourish
  • Memory Box Vivienne Butterfly
  • Memory Box Darla Butterfly
  • Memory Box Scalloped Posie
The base card (white) measures 19cm x 19cm.

First we will start off by doing all the cutting out. You need the following:
  • 1 x piece of black card measuring 12.5cm x 12.5cm
  • 1 x piece of black card measuring 11cm x 11cm
  • 4 x Valerian Flourish on black card
  • 1 x Darla Butterfly on black card
  • 1 x Scalloped Posie on black card
  • 1 x Standard Circle Large on black card
  • 1 x piece of white card measuring 12cm x 12cm
  • 1 x Floral Burst on white card
  • 1 x Damask Accents Border on white card
  • 1 x Vivienne Butterfly on white card
Now to assemble everything!
  • Take the Damask Accents border and score as indicated on the picture below and then valley & mountain fold


  • When you have done all the folding, stick both ends together to create a circle/rosette
  • take the Floral Burst die and put onto the piece of black card measuring 11cm x 11cm and draw around the die and then cut out with a pair of scissors.
  • Next take the white Floral Burst die cut and stick onto the black piece of card you have just cut out, then take the black circle dire cut and stick on top. Then you need to use a quick drying dries clear glue (I use Cosmic Shimmer Acrylic Glue) and put a big blob onto the middle of the black circle
  • Next take the Damask Accents border and stick onto the glue and hold for a few minutes for it to set. At this point you can take the Scalloped Posie and push into the middle and it will help you to hold it all in place whilst it is drying


  • Then take the piece of white card measuring 12cm x 12cm and mat onto the black piece of black card measuring 12.5cm x 12.5cm then turn over so that the black side is facing you and out double sided tape along all four sides and then attach the Valerian Flourish on each side and then mount onto your card black. By the time you have done this, the glue should have dried so that you can attach the topper to the white mount, then add the butterfly and I then finished off with some teardrop stick on gems
Hopefully your card will then look like mine! My sample is done in black and white, but you can choose whatever colours you want.

Everything is available from Oyster Stamps with the exception of the teardrop stick on gems which I have had for years!

Thanks for stopping by and I hope you enjoyed my card. If you have any questions please feel free to ask, but please be aware that at busy times it may take me a while to reply.

Don't forget to leave me a comment and a comment on other blogs to be in with a chance to win!

The next hop is the lovely Barbara on Tuesday and then the grand finale from Martine on Wednesday

Paul xxxxx


Friday, 18 May 2012

Oyster Blog Hop has started!!!

The Oyster Stamps Blog Hop has started!!!!!!!!!!!!


We start with Neet on Friday
Followed by Linda on Saturday
Then onto Pam on Sunday
Yours truly on Monday
Tuesday with move to Barbara
With the grand finale from Martine


Don't forget to leave a comment on all 6 blogs to be in with a chance of winning 2 Spellbinder Cut & Fold die sets


Enjoy!


Paul x

Wednesday, 16 May 2012

Blog Hop!!!!

How exciting! I am going to be involved in my very first Blog Hop over the next few days in conjunction with Oyster Stamps who is hosting there very first Blog Hop together with the other members of the very talented design team! Plus there will also be some candy up for grabs too!!!!!

Wednesday, 18 April 2012

Workshop at Oyster Stamps

Okay, so two posts in one night, but I wanted to share the details of a workshop I did at Oyster Stamps in Rochester on Sunday 15th April 2012. This was my first workshop at Oyster Stamps and I am pleased to say that I had a great day. Sometimes you go to a new place, not knowing how it will go, however I have known Tracey & Graham for many years as a result of doing various retail shows up and down the UK. I was recently introduced to the lovely Martine who works for them and she persuaded me to do a workshop using whatever products I wanted to use. It was easy really, I decided to go with Clarity Stamps, Spellbinder Dies and the stunning dies from Memory Box. As soon as I arrived, I was in crafting heaven. If you have not vistid Oyster Stamps shop or seen them at retail shows up and down the UK, you really missing out. As soon as I arrived, I was given the guided tour and told to use whatever I wanted!!! Anyway, I had a fab day, the ladies on the workshop were great and I left feeling like part of the Oyster Stamps family. I am pleased to say that they felt the same way and I have been invited back to do a 2 day workshop on 2nd & 3rd June 2012 - For more information and to book a place, contact Oyster Stamps HERE

Anyway, here are the samples I made for the workshop - all products are available from Oyster Stamps:


Right, I think that is enough for one night!

First Blog Post!!!

Okay, so I have been asked to create a blog, so I have! I have no idea how often it will be updated, so I aplogise in advance but I have an app for it, so maybe it will be okay!

Anyway, if you want to know a bit more about me and what I do check out my website HERE

The reason I called this blog "Crafty Madness" is because at times that is what it feels like, but to be honest, I would not have it any other way!